The English Pasty

A new post for the new year… only a month late.

This year finds us all in new surroundings, working with different kitchens, different foodstuffs, and of course, hectic schedules. (Some things never change.) My schooling has taken me some five and a half thousand miles away from southern California to the British Isles where I am enjoying the green of all the surroundings and taking full advantage of the British inclination towards cheddars and blue cheeses. This first recipe then, is a nod to my new surroundings: the English Pasty.

Ingredients:

  • 2 Cups Chicken, chopped (soy used in this instance)
  • 2 Cups Carrots, chopped
  • 2 CupsGreen Beans
  • 1- 2 Cubes Vegetable Stock
  • 1½- 2 cups Water (more to be added if needed)
  • 1 Egg White (optional)
  • Salt & Pepper
  • Puff Pastry (you can either use frozen sheets from the store or see below for a recipe to make this yourself)

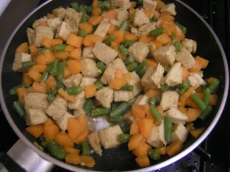
1.) Chop carrots, green beans, and chicken.
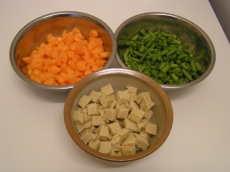
MINOLTA DIGITAL CAMERAMINOLTA DIGITAL CAMERA

2.) Cook carrots, green beans and chicken in a pan with vegetable stock and water until carrots and beans are soft. Add salt and pepper to taste.
MINOLTA DIGITAL CAMERA

3.) Roll out pastry dough to a width of about 1/8 of an inch thick. Cut into squares/ rectangles the size of your choosing. (Must be wide enough for you to fold them over and pinch them shut.)

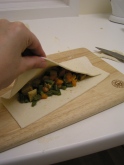
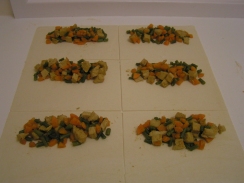
4.) Spoon small mounds of cooked carrot/ green bean/ chicken mixture into centre of each rectangle.
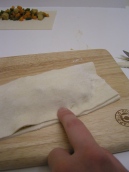
MINOLTA DIGITAL CAMERA

MINOLTA DIGITAL CAMERA5.) Fold the dough over the mixture and pinch edges shut. If you have  overfilled your rectangles you may have to remove some of filling to accomplish this. Trim excess dough.

6.) Place pasties on a cooking tray and brush tops with egg white. (Optional, your pasties will taste just as good if you omit this step.)

7.) Cook at 400°F for 20-25 minutes until golden brown.

MINOLTA DIGITAL CAMERA

The traditional English pasty typically has vegetables and meat in it, sometimes just meat and onions. Being a vegetarian who doesn’t care for onions, these pasties simply have soy chicken, green beans, and carrots. Like the noble taco or burrito though, pasties are a versatile vehicle for wrapping up whatever you’d like, so feel free to put in anything. For breakfast, try eggs, cheese, spinach, mushrooms. For something more stew-like, throw in potatoes or squash. And of course, for those that do eat meat, this recipe is easily adapted.

Pasties are also a good on-the-go food. I usually make 6-8 of them at a time and cook 2 of them either for dinner or for lunch the next day and freeze the rest to be taken out at another time. It is easy enough to pop them in the oven to cook the night before or in the morning whilst you are getting ready for the day.

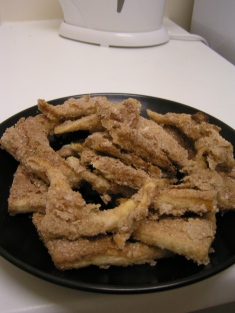
It is also possible to make use of those little bits of dough that you’ve cut off your pasties. Here I’ve dipped them first into the leftover egg white and then into a cinnamon/ sugar mixture.

MINOLTA DIGITAL CAMERA

Puff Pastry Recipe:

  • 2 Cups Flour
  • 1 tsp. salt
  • 2 US sticks of Butter
  • 6-8 Tbl. Cold Water

1.) Mix salt and flour in a large mixing bowl. Cut chunks of cold butter into flour mixture. Rub in. Should resemble moist breadcrumbs.

2.) Add water to mixture slowly, a little at a time until you get a dough that holds together without crumbling but is not sticky. 

3.) Put in fridge to regain firmness before rolling out.

Posted in Breakfast, CMajoros, Dinner, Dishes, Lunch, Uncategorized | Tagged , , , | 5 Comments

Steamed Artichoke with Dipping Sauce

Artichokes always remind me of the summer and of growing up. It was a fixture in my house that Dad would be barbecuing steaks or pork chops and corn on the cob out back on his Weber charcoal grill, while he or Mom sauteed some mushrooms, and steamed some artichokes in the kitchen. In the late afternoon sun, we would all sit down and dig into the feast. That is what eating artichokes will always remind me of, and one of the best parts is the stem.

Ingredients:

  1. 1x artichoke, trimmed
  2. mayo
  3. grainy mustard (I prefer Country Style Grey Poupon, or something similar)
  4. steamer basket insert for soup pot

Steps:

  1. Place the unfolded steamer basket in the sup pot. Fill with cold water until just below the bottom edge of the basket.
  2. Trim the artichoke of its thorns. I tend to trim the center section with a heavy chef’s knife (making it flat so that it stays stable on the basket), and use kitchen shears to trim the rest. Cut the bottom 1/2″ or so off the stem, and peel off some of the tough outer leaves.
  3. Steam the artichoke for about an hour and a half. I set a timer for 45 minutes, check to back sure the water hasn’t all steamed off, and then reset it for another 45 minutes.
  4. Place the artichoke stem down in a bowl, and grab another one for the chewed leaves.

Sauce:

  1. Mix a couple spoonfuls of mayo with a couple of mustard, to your personal preference.

How to Eat:

  1. Pull a leaf off of the artichoke, it should pull off easily. Dip the previously attached end into the dip.
  2. Place the “meaty” portion of the leaf between your teeth and drag outwards, eating dip and leaf.
  3. Repeat until down to the small, barely formed inner leafs.
  4. Pull the remaining leafs off to expose the choke. Scrap the choke off of the base and stem with a spoon. You will see the choke in the picture on the right, which is the bristly material. Run a spoon along the bottom of the choke, and it should separate easily from the base.
  5. Cut the base and stem into fork sized pieces and enjoy!
Posted in CErikson, Dinner, Uncategorized | Tagged | Leave a comment

Adaptive Seeds

Apologies for the long absence. Work and research took control of my time for the past few months, and I have also moved into a new apartment. Between those things, I have had no free time, whatsoever. However, I aim to continue this endeavor.

So, without further adieu, I bring you Adaptive Seeds (where you can learn more about the farm, the people involved, what seed stewardship is, and much more). I received three seed packets, each with approximately 25 seeds in them, of peppers (Chimayo, Mari Nagy Hot, and Gabi Hot Wax) for Christmas, and they have just begin to sprout. I am excited that these are three variety of peppers I have never heard of, and am happy to taste them when the plants have matured. I also received a print seed catalogue as well, although their catalogue is also online, along with full-color pictures and descriptions.

Most importantly, for many people including myself, is that they do not grow seed from proprietary hybrids, patented seed, or GMOs (genetically modified), and all of their seed is grown chemically free. They select the seed for its natural strengths, like resistance to aphids or bacteria/mold, for example. For those food enthusiasts that want to try new varieties of fruits and vegetables, which have been grown naturally, I highly suggest checking it out and experimenting with their varieties.

Posted in CErikson, Discussions and Musings, Ingredient Tips | Leave a comment

Farfalle Pasta with Cauliflower, Mushrooms, and Canned Tomatoes

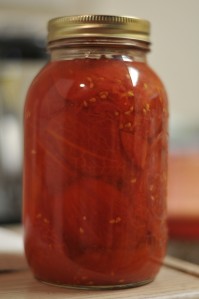
I had some leftover ingredients that I needed to use. So, I decided to make some pasta, using some leftovers veggies and some home-canned tomatoes that my sister gave me for Christmas (canning, by the way, is a fantastic way to preserve a season’s abundance).

Ingredients from inside the box:

  1. 1x bunch King Trumpet Mushrooms, chopped
  2. 1x head cauliflower, chopped

Ingredients from outside the box:

  1. 3x cloves garlic, sliced
  2. 1x jar canned tomatoes
  3. 1x bunch fresh sage, chopped
  4. 2x spicy Italian sausage, cases removed
  5. 1x package farfalle (bow tie) pasta
  6. 1/2 a glass of white wine
  7. salt and pepper, to taste
  8. olive oil
  9. grated pecorino romano cheese

Process:

  1. Set a pot of water to boil.
  2. Pour a couple of glugs of olive oil into a pan, and heat over medium heat.
  3. Add the sliced garlic, and saute a couple of minutes. Be careful not to let it burn.
  4. Add the sausage meat and brown it, stirring occasionally to keep the garlic and meat from burning.
  5. Add the cauliflower and the canned tomatoes. Add the white wine.
  6. Put the lid on, cooking for 5-10 minutes, stirring occasionally.
  7. Add the sage and mushrooms, stirring occasionally.
  8. By now the water should be boiling. Add the farfalle and cook according to package directions.
  9. Drain the pasta, and return to the pot. Add the sauce.
  10. Spoon into a bowl, then serve with a sprinkling of the cheese on top.

Posted in CErikson, Dinner, Dishes | Tagged , , , , | 1 Comment

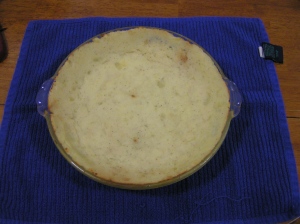
Broccoli Quiche with Mashed Potato Crust

Despite all previous experience, every year I adhere to the naive belief that “holiday break” somehow equates to “time to do lots of stuff.” Obviously the two are unrelated. “A new dish every day!” that’s what I said back in December whilst my fellow authors shook their heads in the sure knowledge that this was nothing but the insane rantings of a delusional individual. Nevertheless, I do have a small collection of recipes waiting and hope to be able to get them posted in the near future.

By substituting mashed potatoes for the more traditional crust, this recipe allows for a quick quiche that makes use of leftovers and whatever green vegetable you happen to have in the fridge. I dedicate this post to all those who remember holiday vacations.

Ingredient from the box:

  • 2 Cups Broccoli (chopped)

Other Ingredients:

  • 1 Cup Shredded Cheese
  • 3 Large Eggs
  • 1 Cup Milk
  • ½ tsp. Salt
  • ½ tsp. Pepper
  • 1½- 2 Cups Mashed Potatoes
  • 1 Tbsp. Olive Oil (for brushing)

1.) If you do not have leftover mashed potatoes, you will need to make them. This recipe assumes that you already have leftover mashed potatoes in the fridge that you are trying to get rid of. If this is the case, squish them into a pie dish, shaping them into a crust, you are aiming for about ¼ inch thickness.

2.) Brush the crust with olive oil and then bake for 30 minutes or until brown.

3.) While the crust is cooking, scramble the eggs and milk together in a bowl and add salt and pepper.

4.) Once the crust is done, add the chopped broccoli, shredded cheese, and egg mixture.

5.) Bake for 30 to 40 minutes until egg is slightly puffy and the center is completely cooked. Let cool for 10 minutes before serving.

*This recipe calls for broccoli but spinach, asparagus, or really any other type of vegetable will work here.

Posted in CMajoros, Dinner, Lunch, Uncategorized | 1 Comment

Eggs Florentine

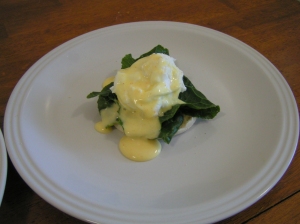
I found myself in a wildly experimental mood today, probably because I’ve just about finished my PhD research proposals, coupled with staying home sick from work at the library.  At any rate, I was suddenly struck with the inspiration to make eggs Florentine, even though I’ve never poached an egg, didn’t know exactly what a poached egg was, and I don’t even like Hollandaise sauce.

Still, I’ve always figured that if I had freshly made Hollandaise I would actually like it.  I looked up recipes and decided to try this one, pretty much following it straight through.  Christie grabbed a lemon from the Farm Fresh box and applied pretty liberally, since she likes that sort of thing (I also applied salt and ground cayenne liberally, since I like that sort of thing).  I also chose not to clarify the butter, but simply melted it in a pan.  The recipe is appreciably detailed, but makes a full pint or so of Hollandaise, so unless you like to drink Hollandaise sauce, or are making it for several people, you’ll want to cut the recipe down.  Here it is re-calculated to fit the “per serving of eggs Florentine/Benedict” model:

1/4 cup butter (per serving; this will make a very buttery sauce, so you may want to tone this down even more)
1 egg yolk (per serving)
1 teaspoon cold water (per egg yolk)
Salt, lemon juice, and cayenne pepper (or whatever else you want), to whatever degree you desire.

Directions:  Melt butter and set it aside.  Bring a pan of water to a boil.  Whip egg yolks pretty well with the cold water and some lemon juice in a bowl, over the simmering pan (the idea here is to steam-heat it).  After a few minutes of this, or until your arm gets really sore, put the bowl down and very slowly add the melted butter while continuing to whip with vigor.  Add lemon juice, salt, and pepper to taste.

The eggs Florentine part:  I didn’t have any of the usual greens to put on the eggs, only collard greens from the box.  So, the result was a very lemony, peppery eggs Florentine with boiled collard greens.

To poach the eggs I used a bit of vinegar (1 teaspoon) to help keep the egg together while it’s floating in the water, which is apparently a common enough technique.  The actual process can be found just about anywhere, so I won’t repost it.  However, I will give this advice:  when it says “pour the egg into the water slowly,” take it literally!  The yolk will drop into the water just about last, and this gives the egg white time to form into a nice ball, making it easier to keep together once the yolk falls in.  With my first egg I used a spoon to help coax the yolk into the water too soon, and had to scramble to keep the egg white together.  Overall, though, the poached eggs were an unexpected success, as was the Hollandaise (which I surprisingly enjoyed—I think I might try it next hot as an artichoke dipping sauce).

Posted in Uncategorized | 2 Comments

Sweet Potato Oranges

Perhaps it’s a bit late to be posting this recipe, I made these for the holidays and in truth they do look rather Christmassy. Nevertheless, these little oranges are tasty, they look fun, and it’s a good way to make use of the entire fruit.

The “valley” box we receive typically contains one or two kinds of citrus fruits and on the one hand this is great because we live in southern California and should be taking advantage of our citrus heritage. On the other hand though, finding ways to use these fruits every week can be challenging… but then, the challenge is the point of this site really.

Ingredient from the Box:  Mandarin Oranges*

*This recipe filled 15 small mandarin oranges, totaling 30 orange halves. You can use larger oranges if you wish.

Other Ingredients:

  • 3 Cups Sweet Potatoes, cooked & mashed
  • 1 Cup White Sugar
  • ¼ Cup Orange Juice
  • 2 Eggs
  • 1 tsp Vanilla Extract
  • ½ Cup Butter, softened
  • 1 Tblsp Orange Peel, grated
  • 1- 2 Cups Pecans, chopped

1.) Cut oranges in half, juice them (gently, don’t break the skin), and scoop out the remaining flesh. Sacrifice a couple of your oranges to grating and make sure to keep the juice. Set aside.

2.) Peel, cube, and boil sweet potatoes until they are soft enough, then mash. Place them in a large mixing bowl and add sugar, orange juice, eggs, vanilla, butter, and grated orange peel.  

3.) Spoon the mixture into the hallowed out orange peels. Sprinkle chopped pecans on top and place the oranges into a baking dish. Bake at 350°F for 30 minutes or until the pecans are brown. (I know they are brown already, I mean baked brown.)

4.) I don’t know that there’s a right way to eat these but I would serve them warm, unless you like cold sweet potatoes. I’m fairly certain you aren’t supposed to eat the skin, so spoons will be necessary. You should also have leftover orange juice for the next morning’s breakfast.

*Afterthoughts: With the cup of white sugar, these potatoes are quite sweet, not overly sweet, in fact much less sweet than candied sweet potatoes, but I tend to think sweet potatoes are sweet enough without too much help. Next time I might cut the sugar to a half cup and use brown sugar instead to lend a more maple-like taste. In the same vein, the recipe I followed called for candied pecans to top the sweet potatoes. Whilst this would have been tasty, it would have added to the sweetness issue and I’m glad I left them plain. If you would like to try candying the pecans, this can be done with butter and brown sugar, roughly ½ cup butter and one cup brown sugar for every cup of pecans.

Posted in CMajoros, Dishes, Uncategorized | 1 Comment

If Anything in the Kitchen is Worth Spending Money On…

It is a good set of knives.

For reasons I won’t go into, when my roommate moved out, I was left with a bad set of cheap knives that could not keep an edge to them. They also rusted easily, and were cheap steel that chipped.

For Christmas, however, I received these:

These are four pieces of a ten piece Wusthof Silverpoint knife set (7 knives, 1 pair kitchen shears, a sharpening rod, and a knife block) given to me by my granny (my mom’s mom).

I have done a little bit of cooking already with these new knives. They are amazing! They are so sharp, and the balance and knife is so well-made that I have to relearn how to cut vegetables. With my old knives, I had gotten into the habit of forcing or sawing the knife through the vegetable.

With these new knives, however, trying to force a knife through a vegetable results in it getting stuck. Instead, I have to lightly slide the knife forward through the vegetable, and it cuts almost effortless. Besides the ease of cutting, there are many things that make good, sharp kitchen knives worth the expense (they should, probably, be the most expensive kitchen tool you own besides any major appliances). Among them are:

  1. This appears paradoxical, but sharper and higher quality knives in the kitchen are actually safer than duller, cheaper ones. The reason for this is that, with a sharper knife, the less force is being applied through the knife, which means that it is less likely for the knife to catch on what is being cut. That means there will be less times that the vegetable (or whatever) slips out of your hand, less times the knife jumps after catching on something; it means the less likely an accident is to happen.
  2. The amount of prep time for each meal will drop radically. As you relearn the best, most efficient ways to use a sharp knife, you will cut things more uniformly and more quickly. This leads to the next benefit,
  3. Cooking becomes more enjoyable. With a shorter prep time, easier cutting, and more time to be spent cooking, then the task itself becomes more of a pleasure, instead of a chore.
Posted in CErikson, Kitchen Gear | 5 Comments

A Minor Victory

I have finally gotten around to making my first contribution to the site.  This is not for lack of trying—since starting up the site I did try making up one or two citrus-based recipes, such as orange-peel oatmeal pancakes, but those failed terribly.  However, a few days ago I managed to make a dish out of pears that more or less succeeded. Continue reading

Posted in SDunnahoe | 4 Comments

Open-faced Egg Sandwich with Leeks

Personally, I think this following dish could be made any time of the day or night. While it was created to be a poor-man’s Eggs Benedict (I don’t always have English muffins at home, and I have no idea how to make hollandaise sauce), it is delicious and filling throughout the day.

Ingredients from in the box:

  1. 1x leek, chopped

Ingredients from out of the box:

  1. 2x medium pieces of rosemary sourdough, toasted (larger piece can be cut in half)
  2. 2x eggs
  3. olive oil
  4. salt and pepper

The Process:

  1. Put your pieces of toast in the toaster or toaster oven. Do NOT toast them yet.
  2. Heat a couple glugs of oil in a pan on medium heat. Toss in the leeks, add a little salt and pepper, and saute until soft.
  3. Remove the leeks with a slotted spoon, leaving as much oil as possible in the pan for frying the eggs (you don’t want to have to add more).
  4. Turn on the toaster/toaster oven.
  5. Crack the eggs into the hot oil, cooking until “done.” (This is a matter of some personal taste. No matter what, the white’s should no longer be transparent on top, but I prefer my yolks still runny. Some people don’t.) Add salt and pepper.
  6. The toast should be done as the eggs are finishing up. Put the toast on a plate, evenly pile the cooked leeks on top, then slide an egg onto each one.

Additional notes: This is a dish that can have many and many a variation through a couple of simple substitutions:

  1. You can really use any type of bread that you want. I really like rosemary sourdough bread in general, besides adding a savory component to the meal. I tend to favor savory flavors, most of the time.
  2. The middle layer can be comprised of many different options. Green beans, asparagus, onions, mushroom, or bell peppers would all work, and those are just a few.
  3. As for the proportions, they are easily adjusted, as you need one egg for one piece of toast. Any other toppings you use, make sure you have enough for each piece.
Posted in Breakfast, CErikson, Dinner, Dishes, Lunch | Tagged , , | 2 Comments